Category Archives: Hardware

Using Food Dye Colouring as Ink

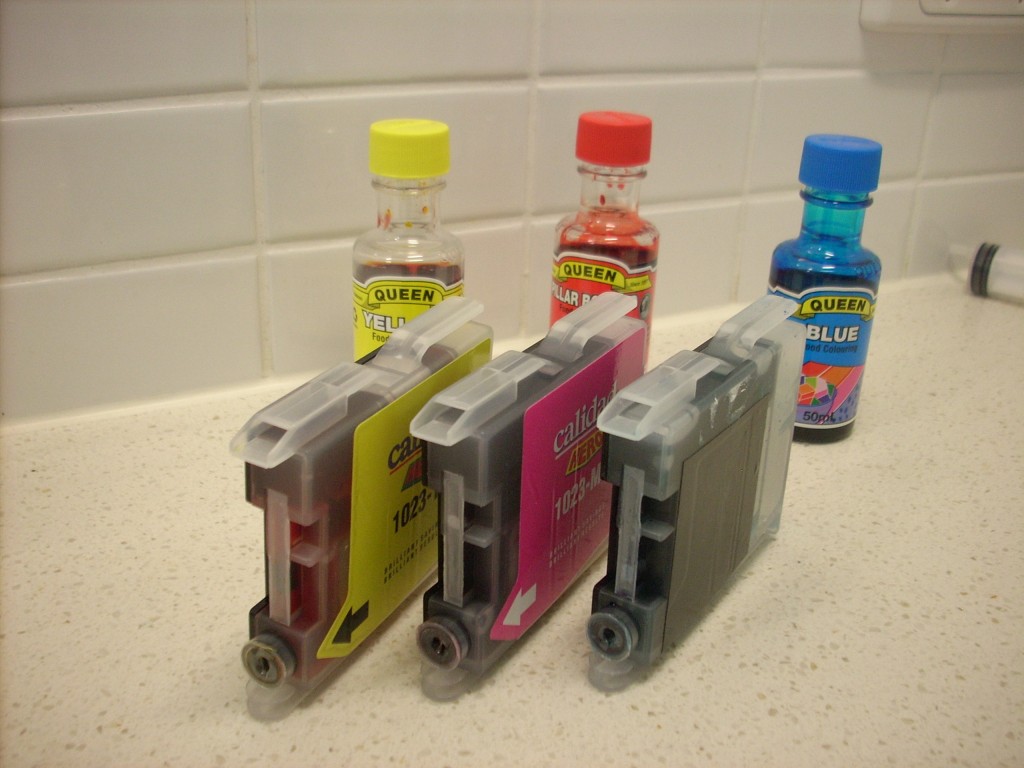
Food Coloring Filled Ink Cartridges
A new set of generic ink cartridges for my ink-jet printer costs around $25 which is too much considering I only get about 10 (colour) pages from them as the printer uses up ink over time keeping the heads clean. So when I was at the supermarket and noticed that 50ml of food colouring is only $1 I had to try using it for printing. Also assuming it would work I bought some rice paper for edible printing!

 WARNING: This may well destroy your print heads and thus your printer. Food Colouring may become toxic during the printing process. Try only at your own risk.

Ingredients

  • Gloves (unless you are happy to have coloured hands)
  • Sink/Basin (ink is going to spill, its part of cartridge refilling)
  • Blue Food Colouring (for Cyan)
  • Pink Food Colouring (for Magenta – I used Red and it made everything a bit dark when printing)
  • Yellow Food Colouring (for Yellow!)
  • Black Food Colouring (for Black – I wish I had bought some – my printing was not edible because had not replaced my black)
  • Syringe (try to get a non-sharp one, if you order one off deal-extreme like i did be very careful since there is no guarantee it is sterile)
  • Instructions for refilling your printer cartridges (search the web – mine were simple enough not to need any)
  • Rice Paper (It needs to be as thin and bendy as possible)

Step One: Flush Out Cartridges

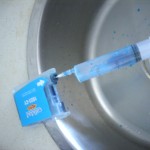
Flushing Printer CartridgeRemoving old ink from cartridgeThe first thing I did was inject my cartridges with water and then empty it out using the syringe. I did this a few times until as much as possible of the previous ink was removed.

Step Two: Determine Capacity
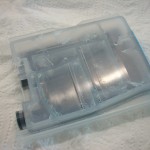
Cartridge micro channelsI did one final flush with water to determine the capacity of the cartridges before I was working with the food dye. Its much better to have the cartridges nearly full than overflowing everywhere. My cartridges have an interesting micro/mini fluid network in them which meant it was only easy to half fill mine.


Step Three: Fill Cartridges
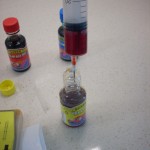
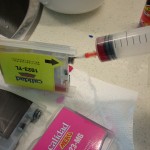
Measured Food ColouringFilling Ink CartridgeFill the syringe with the measured capacity of ink and inject it into the corresponding color of ink cartridge. Then re-install them into your printer.

Step Four: Cleaning
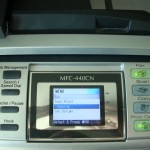
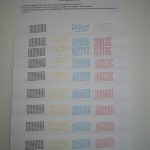
Printer Self Clean / Print Head CleanPrint Quality Test PageIf you haven’t printed in colour for a while like me you’ll meed to run your printers cleaning cycle a few times to bring your print head back to life. I had to run mine about 10 times however if you print colour regularly this should not be a problem. You can check the print heads are clean properly by printing a test page. If you click my test pages image to the right you can see how the print head slowly comes back after many runs of the cleaning function.

Step Five: Test Print Image

Now that everything should be working it is time to print a test image. I chose a full A4 color wheel to test with to get an idea of how well the colours are produced by food colouring. I think you’ll agree from the images below it works fairly well. On my print the pink/purples don’t come out very well. I think that is because I used red dye for magenta rather than pink, unfortunately my supermarket was out of pink food dye.

Big Colour WheelSmall Colour WheelHack a Day Logo in Food Colouring


Step Six: Rice Paper

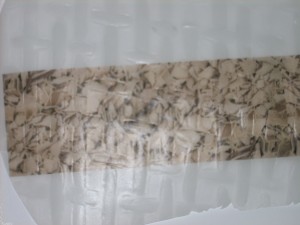
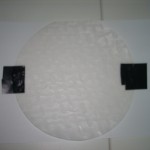
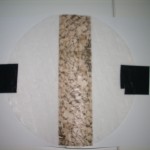
I cut some of the rice paper to roughly A5 and put it in the printer. It worked the first time printing a chocolate flake pattern. However on subsequent tries the rice paper was too britle and broke up in the printer. To overcome this problem I taped the rice paper to an A4 sheet and then printed on it. This worked much better, however It still cracked a little when cutting it. I am sure a better rice paper can be found just not at my local supermarket.

Standard Rice Paper - Not Recommended

Printed Rice Paper

Cutting Rice Paper

Rice Paper taped to sheet

Rice Paper taped Printed


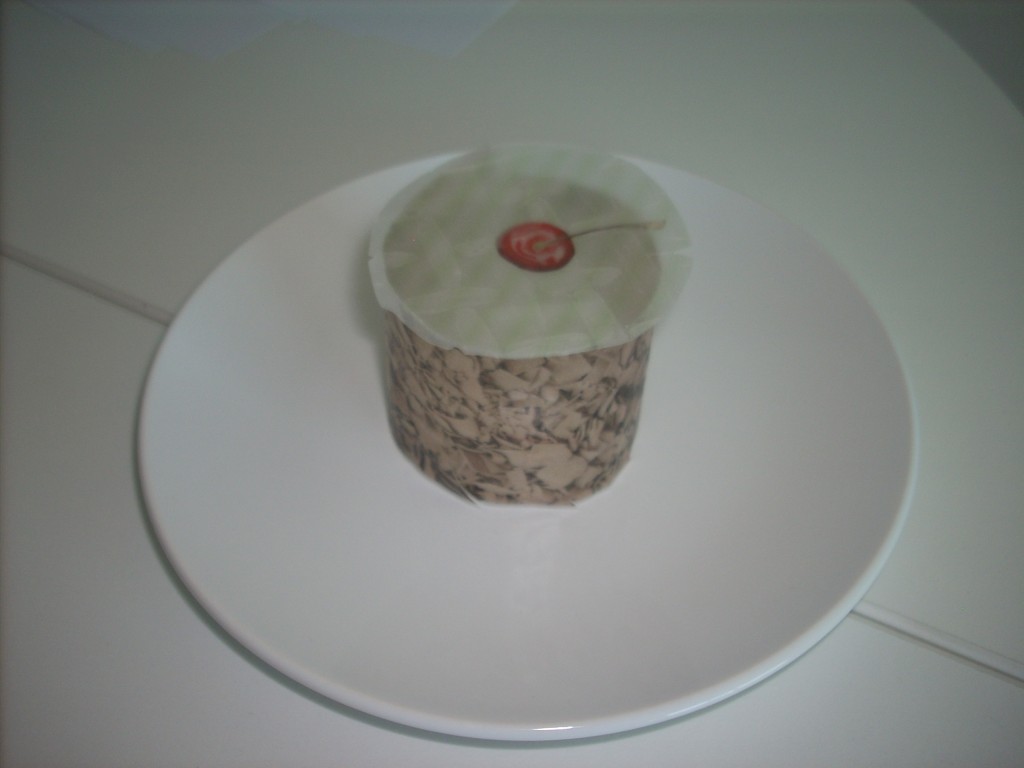
Cake!

Unfortunately was unable to sample it as I had not replaced my black ink with food dye.

Rice Cake with Cherry on Top

Conclusions

  • Food Colouring works just as well for general printing like reports with graphs and word art etc.
  • Photo’s will probably come out looking a little off.
  • Only time will tell if the food colouring is damaging the print heads.

This could be a great way to do custom decoration on cakes or other foods (Christmas/Birthdays/Halloween). I’ll try and put an update on this post a month or two down the track to let you know if the print heads got damaged or are still working.


Adding 3G to HP Mini 210 (1018TU) with EU850D

This post covers getting a EU850D 3G Mini PCIE card working with a HP Mini 210 running Windows 7 Starter and Virgin Mobile Broadband in Australia. These instructions will almost definitely void your warranty and may make your device(s) unusable, so use at your own risk!

Unlocking the HP Mini 210 allowing any PCIE card to work

  1. Download the latest version of your BIOS firmware from the HP website.
  2. Download and install HxD a freeware in memory HEX editor.
  3. Download and install EZH20 Bios Editor.
  4. Download and install 7-zip (allows unzipping of firmware update installer package).
  5. Follow these instructions by GKK adapted from IceLord’s hack for the HP Mini 311.
    • Be careful when saving your new image. The first time I saved my image it made a copy in the installer image file folder rather than replacing the installer folder image.

Ordering and installing the Novatel Wireless EU850D Mini PCIE Card

  1. Order a EU850D, I got mine from Mobilx in Hungary as suggested by jkkmobile, and it took 4 days to get to Australia at a cost of $135AUD.
    • The integrated SIM slot is a key feature as the Australian does not have a SIM socket soldered in (just a blank space filled with foam).
    • This card is Tri-band HSDPA/UMTS – 850/1900/2100 MHz and Quad-band EDGE/GPRS – 850/900/1800/1900 MHz so it should work in most places.
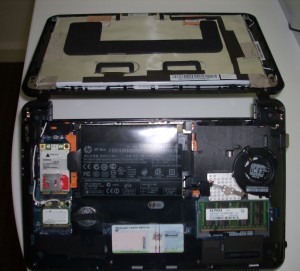
  2. Once your card has arrived remove the access cover from your HP Mini by removing the battery and pressing the two orange ‘buttons’ whilst gently prying the cover up from the battery end.
  3. Unscrew the screw from the empty mini PCIE slot.
  4. Carefully install the EU850D and replace the screw to hold the card in position.
  5. Remove the black/secondary antenna from the half height WiFi PCIE card.
  6. Remove heat shrink holding the two wifi antennas together until the second antenna reaches the primary antenna connector on the EU850D.
  7. Attach the secondary WiFi antenna to the primary antenna connector on the EU850D.
    • The secondary WiFi antenna gave me 2-3x the reception of one of those cheap ebay ‘U’ 3G antennas.
  8. Tidy the antenna cables so that they will not stop the cover from going back on and are not bent sharply or folded.
  9. Insert your sim card in the EU850D (note that it goes in backwards compared to most mobile phones).
  10. Replace the cover by slotting it in at the front and then gently pushing it back down towards the batter end.
  11. Download the driver for the EU850D. I used the ‘MobiLink
    Connection Manager & Driver Installer
    ‘ driver for the XU870 from the Novatel website.
  12. Unzip the download and run the installer.
  13. Done, running the connection manager should show the card as detected.

Making it work with Virgin Mobile Broadband

  1. Open the MobiLink connection manager.
  2. Click the menu button in the top right corner of the manger and select ‘Profile Manager’ in the drop down list.
  3. Click ‘New’ to create a new connection for Virgin Broadband.
  4. Name the profile ‘Virgin Mobile‘, use ‘VirginBroadband‘ in the APN field and make sure ‘IP‘ is selected for the  PDP setting.
  5. Click Next and then finish when prompted for login details as you don’t need to enter any.
  6. In the Profile Manager window again select the newly created ‘Virgin Mobile’ profile and click ‘Edit’.
  7. In the ‘Connection Info’ section, change the authentication type to ‘PAP‘ leaving the username and password fields blank.
  8. Click OK, and then OK again to close the profile manager.
  9. You should now be able to connect when you press ‘connect’ and also when you connect from the windows 7 connection manager.

Thanks to all the people on the web who have posted about getting 3G working on their blogs and forums!


Getting a DNS 323 working with Xbox 360 Elite

Reasons your DNS-323 won’t work with your Xbox 360:

  • You need to update the firmware to the latest version (Xbox support was added in firmware version 1.06).
  • You have upgraded your firmware and not reset to default settings causing UPnP to stay disabled even when you enable it in the web admin settings.
  • You have ‘Root’ sharing enabled in UPnP.
  • Your UPnP directory has filenames & paths longer than 81 characters.
  • Your files have special characters in their names.

Following these steps should resolve all of these issues and get your DNS-323 NAS working with your Xbox 360:

Steps for DNS-323:

  1. Upgrade to the latest firmware.
    1. Download the latest firmware version from the dlink website.
    2. Open the downloaded firmware zip and copy the file inside to your desktop.
    3. Login to your DNS-323.
    4. Select TOOLS from the menu then FIRMWARE.
    5. Click Browse and select the firmware file copied to the desktop in part b.
    6. Then Click Apply to upload the new firmware and install it. Be patient and follow the prompts as it is possible to break your DNS-323 if it is powered of or reset during this process.
  2. Reset to default settings.
    1. Select TOOLS from the menu then SYSTEM.
    2. Click Save under CONFIGURATION SETTINGS to save a copy of your current DNS-323 settings as they will be wiped in the next step.
    3. Click Restore under DEFAULTS. This will cause your DNS-323 to default settings. You might need to use the EasySearch utility to find it again.
    4. Log back into your DNS-323.
    5. Select TOOLS from the menu then SYSTEM.
    6. Click Browse under CONFIGURATION SETTINGS and select the configuration file you saved in step b.
    7. Click Load to restore your previous settings.
  3. Reorganise your media to fit with the DNS-323 path length and character limitations.
    1. Reduce the number of folders and simplify the names of your videos, music and images do not exceed 81 characters in length.
    2. When renaming files they should not contain any special characters, to be safe stick with dashes, spaces, letters and numbers.
  4. Enable UPnP on the DNS-323.
    1. Select ADVANCED then UPnP AV SERVER.
    2. Select enable.
    3. Un-tick Root.
    4. Click Browse and select the medial folder created in step 3.
    5. Click Save Settings.
    6. Click Refresh and wait for your media to be catalogued, you should only need to do this once as the DNS-323 will automatically catalogue newly added files.
  5. Your Xbox should now be able to see folders and files on your DNS-323 when you go to the Video Library, Music Library and Photo Library in the My Xbox menu.

Steps for Xbox 360:

  1. Install ‘Optional iPod Support’ (instructions copied from xbox site for convenience).
    1. Go to the Xbox Live area of the Xbox Dashboard and select Xbox Live Marketplace, Game Downloads.
    2. Select All Games, Alphabetical List of Games.
    3. Select Optional iPod Support twice (once from Xbox Live Marketplace and again from the Xbox Guide screen), then Confirm Download.
    4. Once your download is complete, select Done and return to the Xbox Dashboard (press BACK or B three times).
  2. Note that not all video and audio formats are supported by Xbox 360.
    1. The xbox site has a Video Playback FAQ which lists supported formats.
    2. You can re-encode your videos to work with your Xbox 360 using a tool like Handbrake.


References

D-Link Forum – Bad Characters

D-Link Forum – Path & Filename Length Limitations

D-Link Forum – Codec Issues


New 1.06 firmware released for dlink DNS-323

Update: Version 1.09 is now available.

D-link has just released a version 1.06 firmware update for their DNS-323 NAS. I installed the update without any problems and all my settings remained (previous updates cleared all settings). Also I was pleasantly surprised by the update making the device completely silent when not in use. Previously the fan would constantly run at low speed, so this change is a big plus for anyone who sleeps near their NAS. In addition to this it looks like they have done some tweaking on the performance, previously transfers would max out at 7mbps now they will go up to 8-10mbps depending on the circumstances.The only other major changes are the addition of AV support for xbox 360 and Playstation 3, larger drive support (1.5TB) and the ability to connect your UPS to the usb port!

DNS-323 Firmware 1.06 Release Notes
===========================================================

Feature Additions:
1. Supports 1.5 TB Hard Drives
2. USB port supports UPS monitoring
3. Add option to Manually or Automatically Rebuild Raid
4. UPnP AV supports Microsoft XBoX 360, Sony PlayStation 3
5. Support FTP over SSL/TLS
6. Add Unicode support to FTP Server
7. Email Alerts supports Gmail

Function Changes:
1. Turn off Fan at low system temperature
2. Disable UPnP AV Server and iTunes Server by default.
3. Remove static DNS from the DDNS server provider list
4. Remove the DDNS Timeout setting from GUI, and change
the Status design. fixed timeout timer as 576 hours
5. Remove the Auto Refresh Timer option for UPnP AV and
iTunes Server, instantly Auto Refresh by default.
6. More user friendly Time Settings GUI design

Bug fixes:

1. Fix BT downloaded files sometimes are unable to be deleted
2. UPnP AV support large file (over 4GB)
3. Fix 1st HDD unable to sleep
4. Fix HDD cannot hibernate if UPnP AV or iTunes Server is enabled
5. Time stamp of files are incorrect when DST is enabled

Fix Dell Studio Laptop not returning from sleep

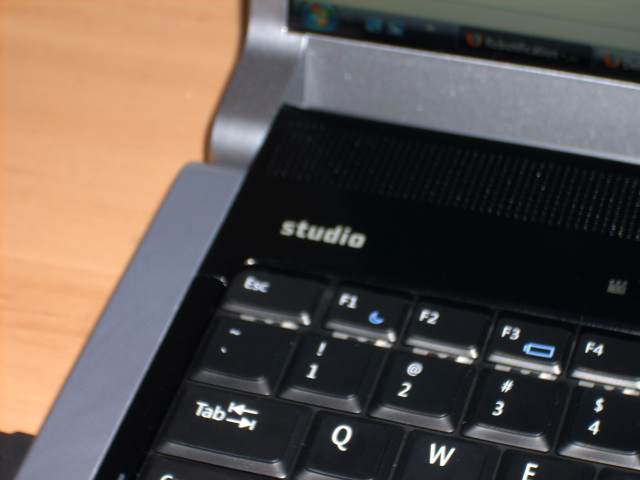
If you have recently bought a new Dell Studio laptop and it won’t wake up after you shut the lid or sleep it, then you need to update the firmware with the new version available from the dell website. The latest version at the moment is ‘A05’.

To download the new firmware:

  1. Go to the Dell website.
  2. Click the Drivers & Downloads link in the Support menu.
  3. Select your laptop model or enter the service tag code.
  4. Click the plus sign (+) next to ‘BIOS’.
  5. Click download to the right of the entry for the ‘A05’ version of the BIOS, and download to your desktop.
  6. Once downloaded, close all other programs and plug in your laptops power adapter, you need to be very very careful when installing new BIOS firmware as you can potentially ‘brick’ your computer.
  7. Right click the BIOS installer and select ‘Run As Administrator’.
  8. Then click ‘continue’ to update your BIOS firmware.
  9. Wait for the update to complete (do not turn your laptop off or disconnect the power as it will kill it).
  10. Once your laptop reboots the firmware should be installed and your sleep function should now work correctly.


NetComm NP285 Ethernet over Power Unit Review

I’ve had Netcomm’s NP285 Ethernet over Power (EoP) units running my home network for two years now and can say that they are very reliable but a bit slow. There arn’t that many reviews of them, so I thought I would write an overview for anyone considering using Ethernet over Power.

Usability

Setup is a breeze (no joke) it is just like you are plugging into a hub or switch, other than your normal IP settings they just work (if only more products were like this). Obviously as they are networking equipment they will work fine with Apples, PC’s, IP Phones or any Ethernet device. They actual units are a little bulky however can just fit next to a standard power plug and while they work best plugged  directly into your power socket, mine did seem to function using a power board.


Reliability

As I said, they work really well. There is a small fluctuation in the speed when something with a big draw turns on or off (heater, dryer, microwave etc). I did have one unit fail (of my 6), however it was under warranty and NetComm replaced it (had to pay to ship it to them, but that was all).

Speed

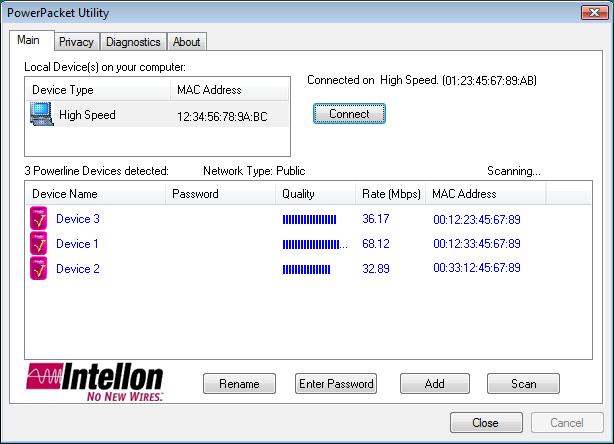
Obviously the marketed speed is the theoretical maximum. In reality on the same circuit the utility reports about 50-70Mbps and on different circuits it reports about 15-30Mbps depending on how good your buildings wiring is.


In my testing the actual sustained speed between two units side by side is about 3MB/s. Which is more akin to about a 24Mbps connection (the utility reported 85Mbps). The advantage of the units is definitely that the connection is reliable and won’t drop out every so often like wireless does, rather than its speed.


If you look at the picture below you will see the monitoring utility where I have one unit on the same circuit and two on different circuits.


Cost

Yes they are expensive, but if you compare their cost to having a professional put cat5 wiring into your home/work they are much cheaper. If you are running the numbers, don’t forget that with the EoP units you don’t need a switch or extra patch leads (units are supplied with patch cords).


My advice for anyone buying EoP units would be to get the newer NP201AV ‘200Mpbs’ units as the connection is much more likely to be like a traditional ‘100Mpbs’ connection (although I haven’t actually tried the new units).


Links


Get Fresh with your Keyboard for free

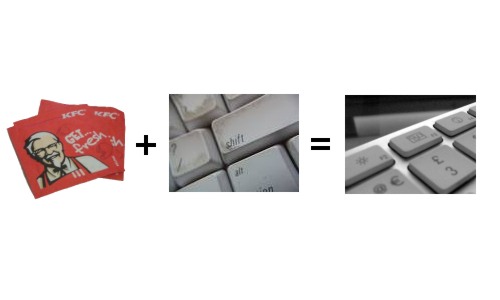
With all the recent ‘scares’ that your keyboard has more bacteria than a toilet seat you might be wondering what to do. Luckily KFC has your back as their finger wipes are perfect for cleaning your keyboard. Best of all KFC provides their wipes free so all you have to do is pick some up next lunch break!
In reality if anything bad was going to come from dirty keyboards it would have by now (go news propaganda :P).

KFC Wipes = Clean Keyboard

*Wipes will not turn your keyboard into a fancy new mac keyboard.