Category Archives: Linux

dns-323 ftp file copy using fun plug, curl and cron

My Brother MFC-440CN Scanner/Printer provides ftp access to the memory card inserted in the card reader and also allows you to scan as pdf direct to the memory card. I wanted to use this as a path to move scanned documents onto my DNS-323 NAS without a PC in the loop. To do this I installed fun_plug and setup a cron job on the DNS-323 to move the files on the memory card to a folder on the DNS-323 every 20 seconds. I couldn’t find a package for the standard ftp client so my script uses curl (somewhat crudley) to fetch and delete the files from the MFC-440CN via FTP.

Here are detailed instructions of how I got the this working:

  1. Install fun_plug (I used the 0.5 version and had my DNS-323 running firmaware 1.08)
    • You only need to go as far as step 6 (ssh working & repository)
    • I started at step 3, as I already use a static IP for my DNS-323
  2. Reboot the DNS-323 after fun_plug is isntalled (required to get funpkg working)
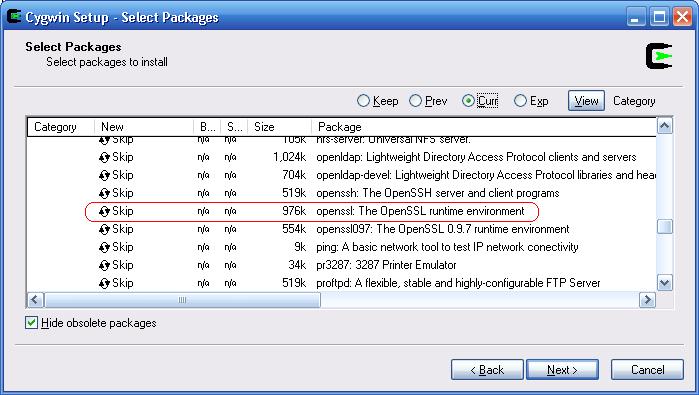
  3. Install CURL, at the prompt type:
    cd /ffp/
    wget curlpackageurl
    wpkg packagename
  4. create a script to copy pdfs from ftp to a directory, by creating a file ‘moveoneftp.sh’ containing the following, However you will need to put your own settings in under ‘#settings vars’:
  5. #!/bin/sh# this script uses curl to copy the first file in the source ftp folder to the target dir
    
    #fix path for funplugexport PATH=/ffp/sbin:/ffp/bin:$PATH
    
    #run it regularly with cron to crudely move a ftp's contents#move means copy and then delete - be careful
    
    #settings varssource_ftp_site="ftp://192.168.1.18/"source_ftp_dir="BROTHER/"source_ftp_dir_path="$source_ftp_site$source_ftp_dir"
    
    target_dir="/mnt/HD_b2/Files/Scan/"file_extension=".PDF"
    
    #programgrep_string="w*$file_extension*w"
    
    echo The GREP is: $grep_stringecho The Source is: $source_ftp_direcho The Target is: $target_dir
    
    #get first file name and process if one foundif file_name=$(curl $source_ftp_dir_path | grep -o -m1 $grep_string)then
    
     echo The file is: $file_name
    
     #wait for 15 seconds in case the scanner is still writing to the file sleep 15
    
     # now copy the file down from the ftp source file_source="$source_ftp_dir_path$file_name" file_target="$target_dir$(date +"%Y-%m-%d_%H_%M_%S.pdf")"
    
     echo The file source is: $file_source echo the file target is: $file_target
    
     #copy if  curl $file_source -o $file_target then  #purge  ftp_cmd="DELE $source_ftp_dir$file_name"
    
      echo ftp command is: $ftp_cmd  curl $source_ftp_site -Q "$ftp_cmd" fifi
  6. Create the file with the follwing under ‘/ffp/start’ called ‘appendcron.sh’ which will add our cron jobs to cron on boot:
    #!/bin/sh
    
    CRONTXT=/mnt/HD_a2/crontab.txt
    
    # start with existing crontab/bin/crontab -l > $CRONTXT
    
    # add cron jobs# job every minute to check for scanned file/bin/echo "* * * * *  /bin/sh /ffp/moveoneftp.sh;sleep 20;/bin/sh /ffp/moveoneftp.sh;sleep 20;/bin/sh /ffp/moveoneftp.sh;" >> $CRONTXT
    
    # install the new crontab/bin/crontab $CRONTXT
    
    # clean up/bin/rm $CRONTXT
  7. Next we need to make our files runnable by chmoding the files we created with ‘a+x’:
    chmod a+x /ffp/moveoneftp.sh
    chmod a+x /ffp/start/appendcron.sh
  8. Reboot and everything should be working! you can check by running ‘top’ and seeing if the script is running.


References/Thanks:

Cron append script I copied from somewhere (it is all over the web) – http://abuhawa.wordpress.com/2009/05/16/backup-from-volume_1-to-volume_1-using-crontab-rsync/

fun_plug installation on DNS-323 – dns323 wiki – http://wiki.dns323.info/howto:1st_steps

cURL documentation – http://curl.haxx.se/docs/manpage.html#-X–request

cURL examples of getting and deleting files via ftp – http://linux.byexamples.com/archives/320/using-curl-to-access-ftp-server/

Forum topic explaining how to config path so shell script runs under cron – http://www.unix.com/shell-programming-scripting/128392-script-runs-fine-but-not-cron.html

How to use grep and only return matched text – http://stackoverflow.com/questions/1546711/grep-show-only-words-that-match-search-pattern (note: use -m1 to return only one/first result)

Cheat sheet for vi (its been a while) – http://www.eec.com/business/vi.html

Tips for bind setup on ubuntu linux

I needed to setup bind on a VPS that only had ssh access and no DNS servers available. I googled and found some good looking articles however it wasn’t quite enough for me to get it working on my server (See references below for the articles – you may want to read through these before continuing). I ended up getting a copy of ‘Bind and DNS’ 5th edition by Paul Albitz and Criket Li (Orielly) which explained the whole process really well. It turns out that if I had known the following things my dns server would have been up and running.

What does the ‘.’ mean on the end of domains in the config file?

So the article says ‘You must ensure you have the full stop on your domain/hostname’ but why? The ‘.’ on the domain indicates that it is an absolute name. In the config file if you do not put the dot on the end of the name it will automatically append the name of your zone onto the name (eg ‘www.google.com’ would become www.google.com.google.com’). This is why missing the dot will stop your config from working. You can
also think of the dot as ‘root’.

Bad:

bob.yourdomainzone.com = bob.yourdomainzone.com.yourdomainzone.com

Good:

bob = bob.yourdomainzone.com

bob.yourdomainzone.com. = bob.yourdomainzone.com

How do i check to see if I have configured bind correctly?

There are three main ways to check up on your bind config you should use them all (in this order).

1. run named-checkconf this will report any errors in your config or nothing if it looks ok (bind version 9 or later required).

2. run named-checkzone yourdomain.com db.configfileforyourdomain for each of your zone config files. This tool will give an ok message or error messages (bind version 9 or later required).

3. run grep named /var/log/daemon.log this will print the lines from daemon.log which contain ‘named’ which
is the name of the bind server process. Reading through the output will show you any errors bind/named had while trying to start. This is useful when you run into that pesky “ * Starting domain name service… bind           [ fail ] ” message.

My DNS server is running and works on the server, but how do I get it to work for people on the internet?

Simply setting up your DNS is not enough, in order for your dns(s) to start resolving you need do two things:

1. You need to register your two nameservers hostnames and IP addresses with your domain provider as valid name servers. If you don’t do this then your nameservers will not  be able to be found as this registration links your nameserver hostname (eg.  ‘ns1.yourdomain.com’) with your nameserver IP address. Most domain name providers will give you a control panel that allows you to register your nameservers. You will know you have the right section as it will let you enter a hostname and an IP address.

Sample Image

2. You need to set your two nameservers as the nameservers for your domain. Your domain providers control panel should have a section for this too. You will know you have the right section as you it should only let you enter addresses (eg. ns1.yourdomain.com) NOT IP Addresses.

Sample Image

If you only have one server you need to setup two hostnames (A records) under your domain that point to the IP of your nameserver. It is common to use ‘ns1.yourdomain.com’ and ‘ns2.yourdomain.com’.

OK it is all working but I don’t really understand how it works?

I highly recommend you get hold of a copy of the book ‘DNS and BIND’ from Orielly. It explains the whole domain name system and also has information on how you can secure your domain name server.

Reference

  • This Article on ZAPHU (http://www.zaphu.com/2007/09/14/ubuntu-dns-server-guide-bind-master-server-setup/)
  • This one on ulyssesonline (http://ulyssesonline.com/2007/11/07/how-to-setup-a-dns-server-in-ubuntu/)
  • Another by Rich Buggy (http://www.buggy.id.au/2007/02/10/ubuntu-sbs-domain-name-server/)
  • DNS and BIND, 5th edition by Paul Albitz and Criket Li, Published by Orielly

Installing OpenSSL on windows

The easiest way I have found to run OpenSSL on Windows is to download and install Cygwin and select OpenSSL during installation.

To install:

  1. Go to the Cygwin Website and download the cygwin installer (Use the ‘Install Cygwin now’ link in the top right corner).
  2. Double click the downloaded installer and click next until you reach the following (package selection) screen:

    Sample Image

  3. Open the ‘Net’ Section

    Sample Image

  4. Select the ‘OpenSSL’ package:

    Sample Image

  5. Continue through to the end of the installer.
  6. Now run cygwin by double clicking the shortcut (you will get a terminal).
  7. Type in ‘openssl’ and press enter. If you get the help info for openssl then you have installed it correctly.

How to Install the Driver for a Ra Link (2400) Wireless Card on Ubuntu

This is the procedure I used to install my ASUS WiFi@Home card AKA a RT2400 from RaLink.

Note: The process is almost identical to the one available on the Ubuntu wiki for RT2500 cards just exchange rt2500 with rt2400. This install guide shows u the simple basics via command line (less bloat I hope).

1. Before you start

You’ll need Ubuntu installed check the Ubuntu website www.ubuntu.org for help with that.

Also note command input and command output colors are the used here.

2. Install Card(Physically) and check its detected

After you have installed the card open a terminal and type:

lspci | grep RaLink

0000:02:0d.0 Network controller: RaLink Wireless PCI Adpator RT2400 / RT2460

If it doesn’t appear as in the second line there is a problem, try moving the card to a different PCI slot, first check you typed the command correctly (including case).

3. Connect to the internet using Ethernet/Modem

If you cant you will have to download the packages manually to a CD or something before proceeding. (Connecting the computer to the net would be much much easier!)

4. Install Compilers and Linux Headers

In a terminal type:

sudo apt-get install build-essential linux-headers-$(uname -r)

After you type your password compilers and Linux headers for your Ubuntu should install should then download and install.

5. Download Driver Source

Download the driver source from http://prdownloads.sourceforge.net/rt2400/ to an easy to remember directory (/home/yourusername). If you type the following command to grab the driver with wget (though you might want to check for a new driver version):

wget http://internap.dl.sourceforge.net/sourceforge/rt2400/rt2400-1.2.2-b3.tar.gz

There are a number of versions, pick the latest stable build (I used beta version 1.2.2-b3).

6. Extract Tarball/Archive

Move to the directory where you saved the driver you downloaded.

To unzip/extract it enter in the command line:

tar –xvzf rt2400-1.2.2-b3.tar.gz

7. Compile Driver

Move to the Module folder in the extracted directory.

cd /rt2400-1.2.2-b3/Module

Then in the command line:

make

The driver should then compile. No errors should occur should end with leaving directory message.

8. Check the driver works

Load the driver module into the kernel (no recompiling J) and check it worked by typing the following in a console:

sudo insmod rt2400.ko

ifconfig ra0 up

ifconfig ra0

ra0 Link encap:Ethernet HWaddr 00:00:00:00:00:00

inet6 addr: fe80::20e:a6ff:fe74:16bb/64 Scope:Link

UP BROADCAST RUNNING MULTICAST MTU:1500 Metric:1

RX packets:41 errors:0 dropped:0 overruns:0 frame:0

TX packets:0 errors:0 dropped:0 overruns:0 carrier:0

collisions:0 txqueuelen:1000

RX bytes:5729 (5.5 KiB) TX bytes:930 (930.0 b)

Interrupt:21 Base address:0x8000

9. Install it permanently

First deactivate the card:

sudo ifdown ra0

Copy the module to the systems module folder:

sudo cp rt2400.ko /lib/modules/`uname -r`/kernel/drivers/net/wireless/

Make ubuntu look for the card on boot:

echo “alias ra0 rt2500” | sudo tee /etc/modprobe.d/rt2500

Rebuild module dependencies:

sudo depmod


10. Auto-config on start

If you want to have your IP address etc automagically set on boot add the following to your /etc/network/interfaces file with your own settings.

auto ra0
iface ra0 inet static
wireless-essid youraccesspointname
        address 192.168.0.5
        netmask 255.255.255.0
        network 192.168.0.0
        broadcast 192.168.0.255
        gateway 192.168.0.1

And add the following to your /etc/resolv.conf file (add your own settings again, your gateway is usually your dns on home network routers).

nameserver 192.168.0.1

11. More Information/References

Driver

Project Website: http://rt2x00.serialmonkey.com/wiki/index.php/Main_Page

Project Source Forge Page: http://sourceforge.net/projects/rt2400

Other Guides

For RT2500 but most relevant guide: https://wiki.ubuntu.com//Rt2500WirelessCardsHowTo/

http://www.methods.co.nz/doc/ralink-2400.html

http://www.linux-militia.net/howtos/asus/asuswifi.html