Author Archives: admin

Using Food Dye Colouring as Ink

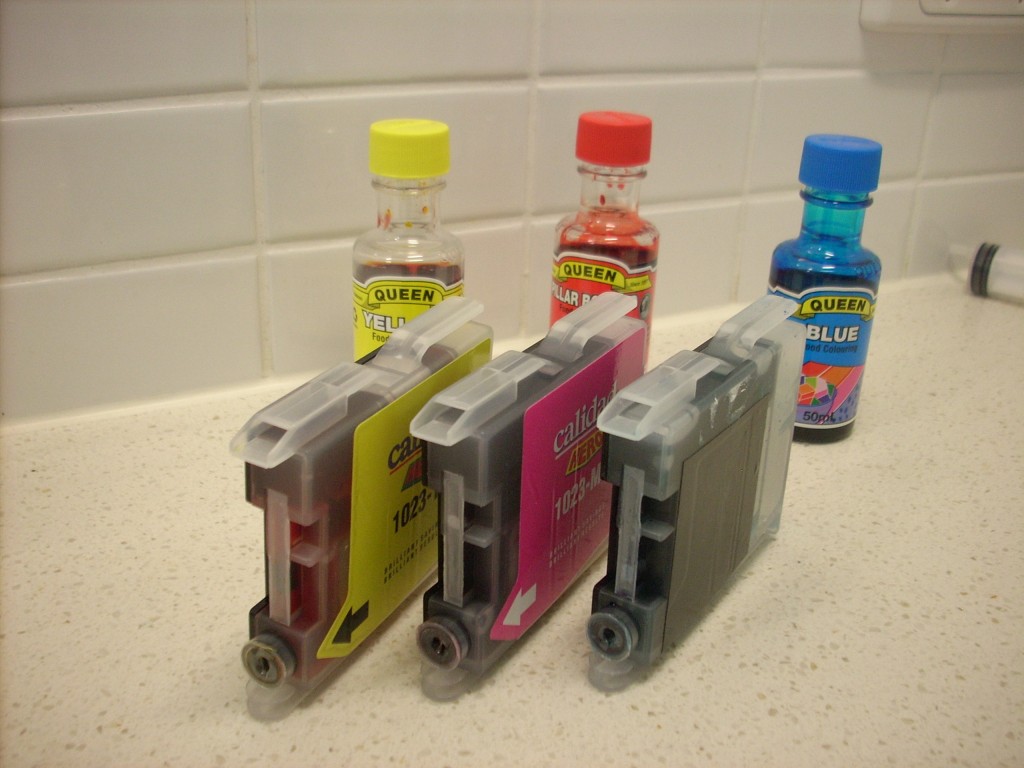
Food Coloring Filled Ink Cartridges
A new set of generic ink cartridges for my ink-jet printer costs around $25 which is too much considering I only get about 10 (colour) pages from them as the printer uses up ink over time keeping the heads clean. So when I was at the supermarket and noticed that 50ml of food colouring is only $1 I had to try using it for printing. Also assuming it would work I bought some rice paper for edible printing!

 WARNING: This may well destroy your print heads and thus your printer. Food Colouring may become toxic during the printing process. Try only at your own risk.

Ingredients

  • Gloves (unless you are happy to have coloured hands)
  • Sink/Basin (ink is going to spill, its part of cartridge refilling)
  • Blue Food Colouring (for Cyan)
  • Pink Food Colouring (for Magenta – I used Red and it made everything a bit dark when printing)
  • Yellow Food Colouring (for Yellow!)
  • Black Food Colouring (for Black – I wish I had bought some – my printing was not edible because had not replaced my black)
  • Syringe (try to get a non-sharp one, if you order one off deal-extreme like i did be very careful since there is no guarantee it is sterile)
  • Instructions for refilling your printer cartridges (search the web – mine were simple enough not to need any)
  • Rice Paper (It needs to be as thin and bendy as possible)

Step One: Flush Out Cartridges

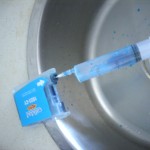
Flushing Printer CartridgeRemoving old ink from cartridgeThe first thing I did was inject my cartridges with water and then empty it out using the syringe. I did this a few times until as much as possible of the previous ink was removed.

Step Two: Determine Capacity
Cartridge micro channelsI did one final flush with water to determine the capacity of the cartridges before I was working with the food dye. Its much better to have the cartridges nearly full than overflowing everywhere. My cartridges have an interesting micro/mini fluid network in them which meant it was only easy to half fill mine.


Step Three: Fill Cartridges
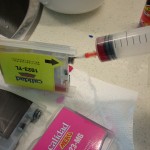
Measured Food ColouringFilling Ink CartridgeFill the syringe with the measured capacity of ink and inject it into the corresponding color of ink cartridge. Then re-install them into your printer.

Step Four: Cleaning
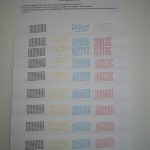
Printer Self Clean / Print Head CleanPrint Quality Test PageIf you haven’t printed in colour for a while like me you’ll meed to run your printers cleaning cycle a few times to bring your print head back to life. I had to run mine about 10 times however if you print colour regularly this should not be a problem. You can check the print heads are clean properly by printing a test page. If you click my test pages image to the right you can see how the print head slowly comes back after many runs of the cleaning function.

Step Five: Test Print Image

Now that everything should be working it is time to print a test image. I chose a full A4 color wheel to test with to get an idea of how well the colours are produced by food colouring. I think you’ll agree from the images below it works fairly well. On my print the pink/purples don’t come out very well. I think that is because I used red dye for magenta rather than pink, unfortunately my supermarket was out of pink food dye.

Big Colour WheelSmall Colour WheelHack a Day Logo in Food Colouring


Step Six: Rice Paper

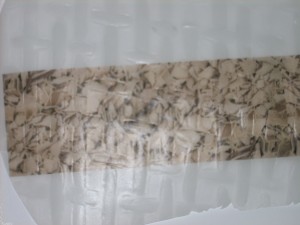
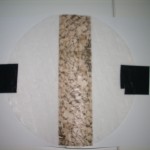
I cut some of the rice paper to roughly A5 and put it in the printer. It worked the first time printing a chocolate flake pattern. However on subsequent tries the rice paper was too britle and broke up in the printer. To overcome this problem I taped the rice paper to an A4 sheet and then printed on it. This worked much better, however It still cracked a little when cutting it. I am sure a better rice paper can be found just not at my local supermarket.

Standard Rice Paper - Not Recommended

Printed Rice Paper

Cutting Rice Paper

Rice Paper taped to sheet

Rice Paper taped Printed


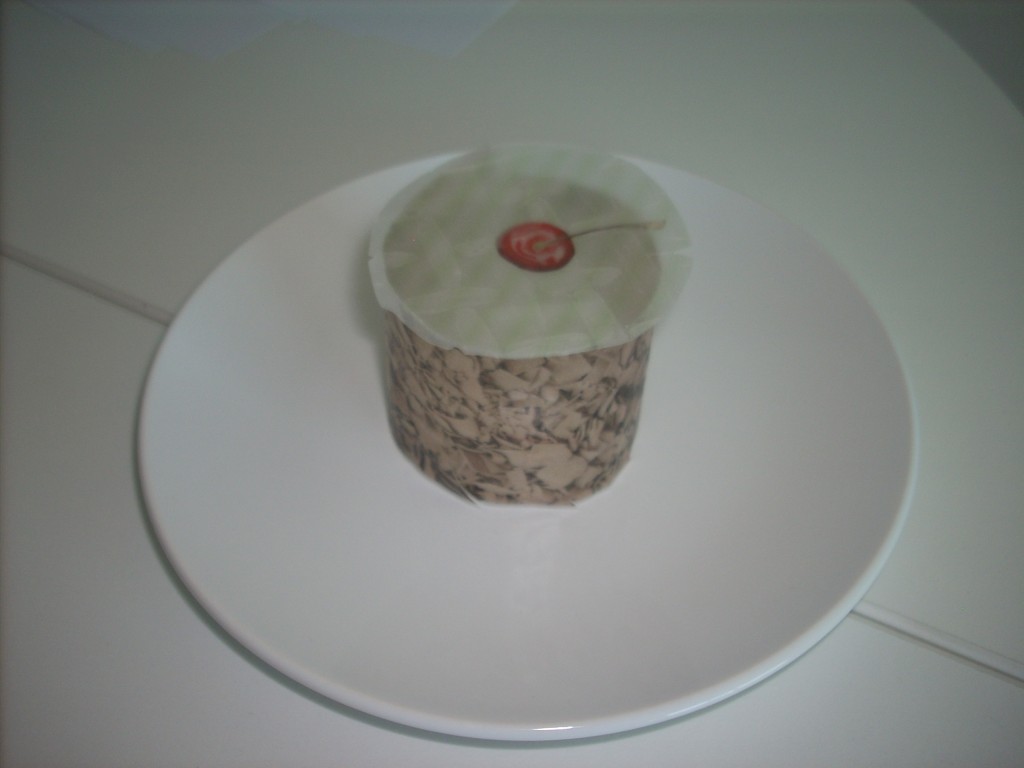
Cake!

Unfortunately was unable to sample it as I had not replaced my black ink with food dye.

Rice Cake with Cherry on Top

Conclusions

  • Food Colouring works just as well for general printing like reports with graphs and word art etc.
  • Photo’s will probably come out looking a little off.
  • Only time will tell if the food colouring is damaging the print heads.

This could be a great way to do custom decoration on cakes or other foods (Christmas/Birthdays/Halloween). I’ll try and put an update on this post a month or two down the track to let you know if the print heads got damaged or are still working.


Adding Aux Line-in (and USB Power) to an 03 Subaru Impreza Stock Radio

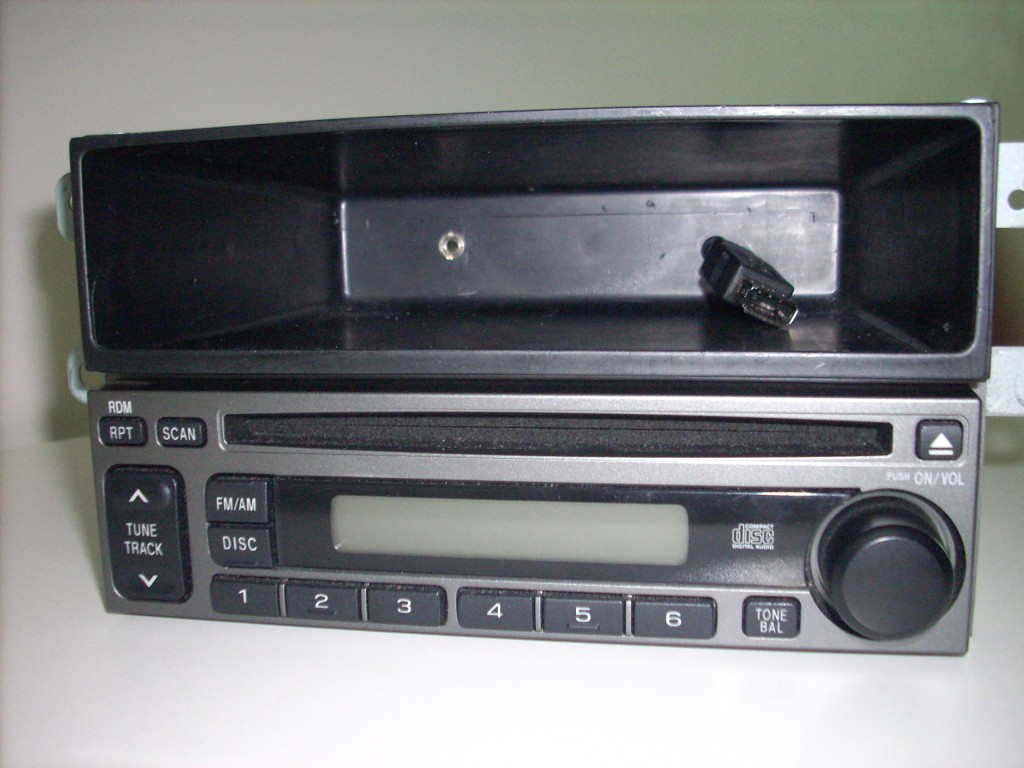
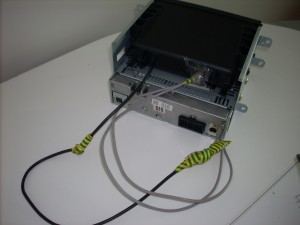
Finished Front Connections to Stereo
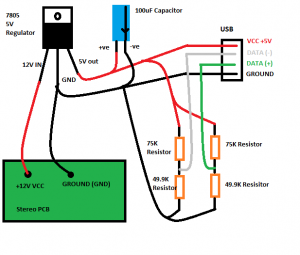
I was impressed with Jordan’s simple hack to add an auxilary input to a stock stero head unit and had to try it myself. As my head unit is rather busy on the front panel I routed the input jack into the back of the tray above. I also added a USB charging socket using a 7805 Voltage Regualtor and the data line configuration from Ladyada’s Minty Boost.

WARNING: Obviously opening up your radio and cutting/soldering risks breaking it and will most definitely void your warranty, be prepared to buy a new head unit if it all goes wrong.


Step One: Removing the Head Unit and Cage

On many Subaru’s you have to remove the centre console in order to remove the head unit cage. However on my 03 Impreza Sportswagon all you have to do is pop open the drink holder above the stereo and then gently pop the trim off from around the head unit. Unfortunately I did not figure this out until I had removed my entire centre console! So hopefully the same won’t happen to you.

Step Two: Locating the Radio Lines

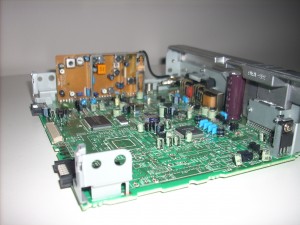
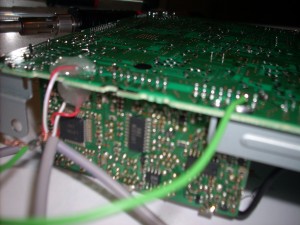
Stero Head Unit showing Radio CardI’d recommend reading Jordan’s Post as a reference. You will need to dissasemble your stereo until you can find a point on the circuit board where you can safely cut the radio lines (FM or AM) and then reconnect them through the 3.5mm switching socket. Try and find points where components are soldered in to add your wires, soldering to a track is virtually impossible.

If you can’t locate the lines, you will need to do some diagnostics with a multimeter or give up.


Step Three: Wiring Up the Switching Socket/Jack

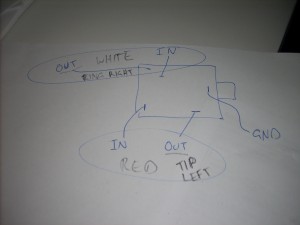
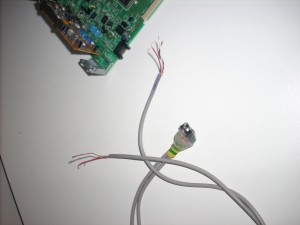
From wikipedia in a 3.5mm stereo jack the tip is left channel, the ring is the right channel and the  Base/last ring is the ground. You will need to look at the data sheet from your socket to determine which pins are which and then solder a wire to each. The pictures show the wiring I used for a socket I bought from Jaycar in Australia.


Step Four: Cut the Radio Left and Right Lines and Solder in the Socket

Since my stereo has the radio on a seperate little board inside, I severed the connection between the radio and main amp board for the two FM channels. In retrospect I would have been better finding a section of track to cut as the connection between teh two boards was really strong and I had to use a drill to cut away the connections.

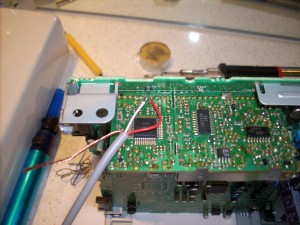
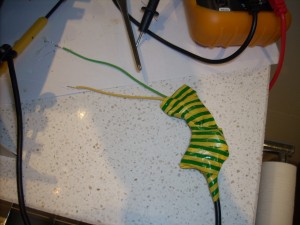
Once the connections were severed I connected the OUT wire connections from the socket to the amplifier side of the lines and the IN wire connections to the Radio side. I soldered the ground wires to the same ground pin on the amplifier side of the stereo (green wire in step five picture).


Step Five: Test Connections with a Multimeter Then Glue

Soldered and GluedSet the multimeter to the beep test (resistance) and check that none of your lines are connected to each other and also that they are connected to the board (probe your connection and next connection along track). Once the connections are checked then you need to glue down the wires so they do not come loose during your next rally.


Step Six: USB Charging Circuit

For the charging circuit I soldered together a USB Socket and the components on the left as per the diagram. Covering the entire circuit in electrical tape to protect it and then soldering it to the VCC and Ground of the stereo. Once again I checked the connections and glued to hold in place.

The data lines attach into the resistor ladder network in order to be held at 2 volts each. This tells many products (Ipods etc – see the minty boost compatability list) to charge and draw half an amp.

Click the diagram for larger image.

NOTE: If you use a USB cable socket as I have you will need to thread the cable through the tray before soldering up the charging circuit.


Step Seven: Mount the connectors

Carefully re-assemble your stereo and route the cables out the back (you may need to bend the casing or drill a hole).

Drill a hole for the 3.5mm socket and mount it into the plastic tray using the screw on the socket and with glue at the back.

If your USB socket is a cable like mine, wrap some electrical tape around the cable as pictures to stop it pulling through and breaking the soldered connections.


Step Eight: Re-install

Plug in your stereo before re mounting and turn it on. Be ready to turn it off quickly if there is any smoke, sparks, or bad burning smells, if this happens then something is wired wrong, dis-assemble and re-check everything.

If it powers on without issue check the CD, AM/FM etc are all working as well as your new auxilary line in. Onces it is all working remount the stereo and re-attach the trim etc.

All Done!


A free feedback / help button for your website with HelpMe.js

free feedback link screenshot

If you use a service like getsatisfaction.com or snapabug.com they will charge you upwards of $20 a month for the privelage of having a ‘feedback’ tab/button on the side of your website and the ability to accept feedback. Granted they give you lots of features to manage and track your feedback, but if you just have a small site it is an unjustifiable cost.

Thats why I made a free JavaScript called ‘HelpMe’ that you can include in you web pages that displays a ‘help’ tab/button on the side of your web page and links to a Google Docs Form or just creates a pre-formated email for your user to send to you.

Setup is easy:

  1. Download HelpMe.zip and unzip it.
  2. Open helpme.js with a text editor and fill in the values under the //Settings sectionhelpme.js settings setup screenshot
    1. If you are using a Google Docs Form just place the url for your form in the setting b.googleFormUrl .
    2. If you are using email then enter your email, subject and body in place of the examples and make sure that b.googleFormUrl is set to “” (blank).
  3. Save helpme.js
  4. Upload the helpme folder including ‘helpme.js’ and ‘helpme.png’ to the root of your website.
  5. Place the tag  <script type=”text/javascript” src=”/helpme/helpme.js” /> in the head or body of the pages where you want the button to appear.

Thats it, Enjoy!


dns-323 ftp file copy using fun plug, curl and cron

My Brother MFC-440CN Scanner/Printer provides ftp access to the memory card inserted in the card reader and also allows you to scan as pdf direct to the memory card. I wanted to use this as a path to move scanned documents onto my DNS-323 NAS without a PC in the loop. To do this I installed fun_plug and setup a cron job on the DNS-323 to move the files on the memory card to a folder on the DNS-323 every 20 seconds. I couldn’t find a package for the standard ftp client so my script uses curl (somewhat crudley) to fetch and delete the files from the MFC-440CN via FTP.

Here are detailed instructions of how I got the this working:

  1. Install fun_plug (I used the 0.5 version and had my DNS-323 running firmaware 1.08)
    • You only need to go as far as step 6 (ssh working & repository)
    • I started at step 3, as I already use a static IP for my DNS-323
  2. Reboot the DNS-323 after fun_plug is isntalled (required to get funpkg working)
  3. Install CURL, at the prompt type:
    cd /ffp/
    wget curlpackageurl
    wpkg packagename
  4. create a script to copy pdfs from ftp to a directory, by creating a file ‘moveoneftp.sh’ containing the following, However you will need to put your own settings in under ‘#settings vars’:
  5. #!/bin/sh# this script uses curl to copy the first file in the source ftp folder to the target dir
    
    #fix path for funplugexport PATH=/ffp/sbin:/ffp/bin:$PATH
    
    #run it regularly with cron to crudely move a ftp's contents#move means copy and then delete - be careful
    
    #settings varssource_ftp_site="ftp://192.168.1.18/"source_ftp_dir="BROTHER/"source_ftp_dir_path="$source_ftp_site$source_ftp_dir"
    
    target_dir="/mnt/HD_b2/Files/Scan/"file_extension=".PDF"
    
    #programgrep_string="w*$file_extension*w"
    
    echo The GREP is: $grep_stringecho The Source is: $source_ftp_direcho The Target is: $target_dir
    
    #get first file name and process if one foundif file_name=$(curl $source_ftp_dir_path | grep -o -m1 $grep_string)then
    
     echo The file is: $file_name
    
     #wait for 15 seconds in case the scanner is still writing to the file sleep 15
    
     # now copy the file down from the ftp source file_source="$source_ftp_dir_path$file_name" file_target="$target_dir$(date +"%Y-%m-%d_%H_%M_%S.pdf")"
    
     echo The file source is: $file_source echo the file target is: $file_target
    
     #copy if  curl $file_source -o $file_target then  #purge  ftp_cmd="DELE $source_ftp_dir$file_name"
    
      echo ftp command is: $ftp_cmd  curl $source_ftp_site -Q "$ftp_cmd" fifi
  6. Create the file with the follwing under ‘/ffp/start’ called ‘appendcron.sh’ which will add our cron jobs to cron on boot:
    #!/bin/sh
    
    CRONTXT=/mnt/HD_a2/crontab.txt
    
    # start with existing crontab/bin/crontab -l > $CRONTXT
    
    # add cron jobs# job every minute to check for scanned file/bin/echo "* * * * *  /bin/sh /ffp/moveoneftp.sh;sleep 20;/bin/sh /ffp/moveoneftp.sh;sleep 20;/bin/sh /ffp/moveoneftp.sh;" >> $CRONTXT
    
    # install the new crontab/bin/crontab $CRONTXT
    
    # clean up/bin/rm $CRONTXT
  7. Next we need to make our files runnable by chmoding the files we created with ‘a+x’:
    chmod a+x /ffp/moveoneftp.sh
    chmod a+x /ffp/start/appendcron.sh
  8. Reboot and everything should be working! you can check by running ‘top’ and seeing if the script is running.


References/Thanks:

Cron append script I copied from somewhere (it is all over the web) – http://abuhawa.wordpress.com/2009/05/16/backup-from-volume_1-to-volume_1-using-crontab-rsync/

fun_plug installation on DNS-323 – dns323 wiki – http://wiki.dns323.info/howto:1st_steps

cURL documentation – http://curl.haxx.se/docs/manpage.html#-X–request

cURL examples of getting and deleting files via ftp – http://linux.byexamples.com/archives/320/using-curl-to-access-ftp-server/

Forum topic explaining how to config path so shell script runs under cron – http://www.unix.com/shell-programming-scripting/128392-script-runs-fine-but-not-cron.html

How to use grep and only return matched text – http://stackoverflow.com/questions/1546711/grep-show-only-words-that-match-search-pattern (note: use -m1 to return only one/first result)

Cheat sheet for vi (its been a while) – http://www.eec.com/business/vi.html

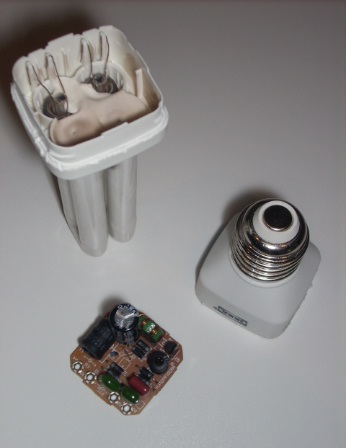
Inside a CFL Light Globe

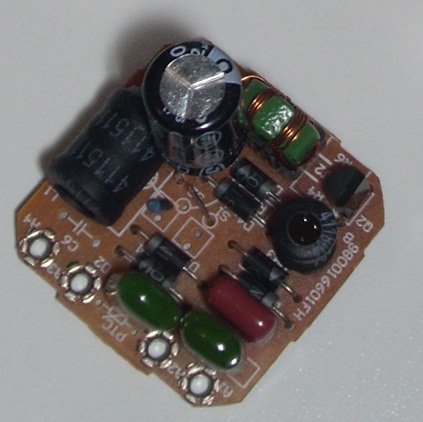
It’s a pity we throw out a perfectly good ballast circuit each time a CFL globe blows. CFL bulbs should really be re-designed so that you can just replace the tube part. Alternatively a proper recycling program could make sure the circuits get re-used in new lights.

Inside a CFL Light Globe

CFL Ballast Circuit Board


Adding 3G to HP Mini 210 (1018TU) with EU850D

This post covers getting a EU850D 3G Mini PCIE card working with a HP Mini 210 running Windows 7 Starter and Virgin Mobile Broadband in Australia. These instructions will almost definitely void your warranty and may make your device(s) unusable, so use at your own risk!

Unlocking the HP Mini 210 allowing any PCIE card to work

  1. Download the latest version of your BIOS firmware from the HP website.
  2. Download and install HxD a freeware in memory HEX editor.
  3. Download and install EZH20 Bios Editor.
  4. Download and install 7-zip (allows unzipping of firmware update installer package).
  5. Follow these instructions by GKK adapted from IceLord’s hack for the HP Mini 311.
    • Be careful when saving your new image. The first time I saved my image it made a copy in the installer image file folder rather than replacing the installer folder image.

Ordering and installing the Novatel Wireless EU850D Mini PCIE Card

  1. Order a EU850D, I got mine from Mobilx in Hungary as suggested by jkkmobile, and it took 4 days to get to Australia at a cost of $135AUD.
    • The integrated SIM slot is a key feature as the Australian does not have a SIM socket soldered in (just a blank space filled with foam).
    • This card is Tri-band HSDPA/UMTS – 850/1900/2100 MHz and Quad-band EDGE/GPRS – 850/900/1800/1900 MHz so it should work in most places.
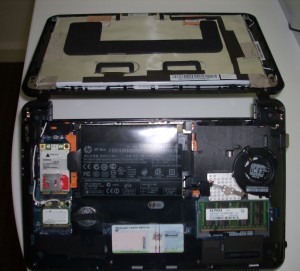
  2. Once your card has arrived remove the access cover from your HP Mini by removing the battery and pressing the two orange ‘buttons’ whilst gently prying the cover up from the battery end.
  3. Unscrew the screw from the empty mini PCIE slot.
  4. Carefully install the EU850D and replace the screw to hold the card in position.
  5. Remove the black/secondary antenna from the half height WiFi PCIE card.
  6. Remove heat shrink holding the two wifi antennas together until the second antenna reaches the primary antenna connector on the EU850D.
  7. Attach the secondary WiFi antenna to the primary antenna connector on the EU850D.
    • The secondary WiFi antenna gave me 2-3x the reception of one of those cheap ebay ‘U’ 3G antennas.
  8. Tidy the antenna cables so that they will not stop the cover from going back on and are not bent sharply or folded.
  9. Insert your sim card in the EU850D (note that it goes in backwards compared to most mobile phones).
  10. Replace the cover by slotting it in at the front and then gently pushing it back down towards the batter end.
  11. Download the driver for the EU850D. I used the ‘MobiLink
    Connection Manager & Driver Installer
    ‘ driver for the XU870 from the Novatel website.
  12. Unzip the download and run the installer.
  13. Done, running the connection manager should show the card as detected.

Making it work with Virgin Mobile Broadband

  1. Open the MobiLink connection manager.
  2. Click the menu button in the top right corner of the manger and select ‘Profile Manager’ in the drop down list.
  3. Click ‘New’ to create a new connection for Virgin Broadband.
  4. Name the profile ‘Virgin Mobile‘, use ‘VirginBroadband‘ in the APN field and make sure ‘IP‘ is selected for the  PDP setting.
  5. Click Next and then finish when prompted for login details as you don’t need to enter any.
  6. In the Profile Manager window again select the newly created ‘Virgin Mobile’ profile and click ‘Edit’.
  7. In the ‘Connection Info’ section, change the authentication type to ‘PAP‘ leaving the username and password fields blank.
  8. Click OK, and then OK again to close the profile manager.
  9. You should now be able to connect when you press ‘connect’ and also when you connect from the windows 7 connection manager.

Thanks to all the people on the web who have posted about getting 3G working on their blogs and forums!


Getting a DNS 323 working with Xbox 360 Elite

Reasons your DNS-323 won’t work with your Xbox 360:

  • You need to update the firmware to the latest version (Xbox support was added in firmware version 1.06).
  • You have upgraded your firmware and not reset to default settings causing UPnP to stay disabled even when you enable it in the web admin settings.
  • You have ‘Root’ sharing enabled in UPnP.
  • Your UPnP directory has filenames & paths longer than 81 characters.
  • Your files have special characters in their names.

Following these steps should resolve all of these issues and get your DNS-323 NAS working with your Xbox 360:

Steps for DNS-323:

  1. Upgrade to the latest firmware.
    1. Download the latest firmware version from the dlink website.
    2. Open the downloaded firmware zip and copy the file inside to your desktop.
    3. Login to your DNS-323.
    4. Select TOOLS from the menu then FIRMWARE.
    5. Click Browse and select the firmware file copied to the desktop in part b.
    6. Then Click Apply to upload the new firmware and install it. Be patient and follow the prompts as it is possible to break your DNS-323 if it is powered of or reset during this process.
  2. Reset to default settings.
    1. Select TOOLS from the menu then SYSTEM.
    2. Click Save under CONFIGURATION SETTINGS to save a copy of your current DNS-323 settings as they will be wiped in the next step.
    3. Click Restore under DEFAULTS. This will cause your DNS-323 to default settings. You might need to use the EasySearch utility to find it again.
    4. Log back into your DNS-323.
    5. Select TOOLS from the menu then SYSTEM.
    6. Click Browse under CONFIGURATION SETTINGS and select the configuration file you saved in step b.
    7. Click Load to restore your previous settings.
  3. Reorganise your media to fit with the DNS-323 path length and character limitations.
    1. Reduce the number of folders and simplify the names of your videos, music and images do not exceed 81 characters in length.
    2. When renaming files they should not contain any special characters, to be safe stick with dashes, spaces, letters and numbers.
  4. Enable UPnP on the DNS-323.
    1. Select ADVANCED then UPnP AV SERVER.
    2. Select enable.
    3. Un-tick Root.
    4. Click Browse and select the medial folder created in step 3.
    5. Click Save Settings.
    6. Click Refresh and wait for your media to be catalogued, you should only need to do this once as the DNS-323 will automatically catalogue newly added files.
  5. Your Xbox should now be able to see folders and files on your DNS-323 when you go to the Video Library, Music Library and Photo Library in the My Xbox menu.

Steps for Xbox 360:

  1. Install ‘Optional iPod Support’ (instructions copied from xbox site for convenience).
    1. Go to the Xbox Live area of the Xbox Dashboard and select Xbox Live Marketplace, Game Downloads.
    2. Select All Games, Alphabetical List of Games.
    3. Select Optional iPod Support twice (once from Xbox Live Marketplace and again from the Xbox Guide screen), then Confirm Download.
    4. Once your download is complete, select Done and return to the Xbox Dashboard (press BACK or B three times).
  2. Note that not all video and audio formats are supported by Xbox 360.
    1. The xbox site has a Video Playback FAQ which lists supported formats.
    2. You can re-encode your videos to work with your Xbox 360 using a tool like Handbrake.


References

D-Link Forum – Bad Characters

D-Link Forum – Path & Filename Length Limitations

D-Link Forum – Codec Issues